> ## Documentation Index
> Fetch the complete documentation index at: https://docs.hologram.io/llms.txt
> Use this file to discover all available pages before exploring further.
# Connect a Raspberry Pi to the internet using a Hologram SIM
> Connect a Raspberry Pi to the internet using a cellular modem and a Hologram SIM with NetworkManager (nmcli) and ModemManager (mmcli), then verify connectivity with a ping test.
## Requirements
* A Raspberry Pi, with a mouse, keyboard, and monitor for the initial setup.
* A cellular modem with an activated Hologram SIM and a data plan. If you have not activated your SIM yet, see [Activate your first SIMs](/guides/get-started/activate-your-first-sims).
* NetworkManager (`nmcli`), pre-installed starting on Debian 12 (bookworm).
* ModemManager (`mmcli`), pre-installed starting on Debian 12 (bookworm).
## Connect the Raspberry Pi
Confirm that both `mmcli` and `nmcli` are available:
```bash theme={null}
which mmcli
which nmcli
```
Both are installed by default on Debian 12 and later. If either is missing, install it:
```bash theme={null}
# NetworkManager
sudo apt-get install network-manager
# ModemManager (note: the Raspbian package name is all lowercase)
sudo apt-get install modemmanager
```
On Debian 11-based and older images, set up your network connection with NetworkManager **before** continuing, so you do not lose access to the device. Newer images do this automatically, and this step is not needed if you use Ethernet.
**Important:** Set up WiFi while the Raspberry Pi is connected to a monitor, keyboard, and mouse. You can lose remote access after installing `nmcli`. If you used the Raspberry Pi Imager, you can set the WiFi SSID and password there until you can set up Ethernet.
```bash theme={null}
# Check connections
nmcli device
nmcli device show wlan0
nmcli connection
# Enable WiFi
nmcli radio
nmcli device wifi list
nmcli device status
# Connect to WiFi
sudo nmcli device wifi connect password ""
nmcli device status
nmcli connection show
# Verify the services are running (you may need to restart first)
sudo systemctl status ModemManager
sudo systemctl status NetworkManager
```
Insert your activated SIM into the modem, then connect the cellular modem to your Raspberry Pi via USB.
Verify that the Raspberry Pi detects the modem:
```bash theme={null}
lsusb
```
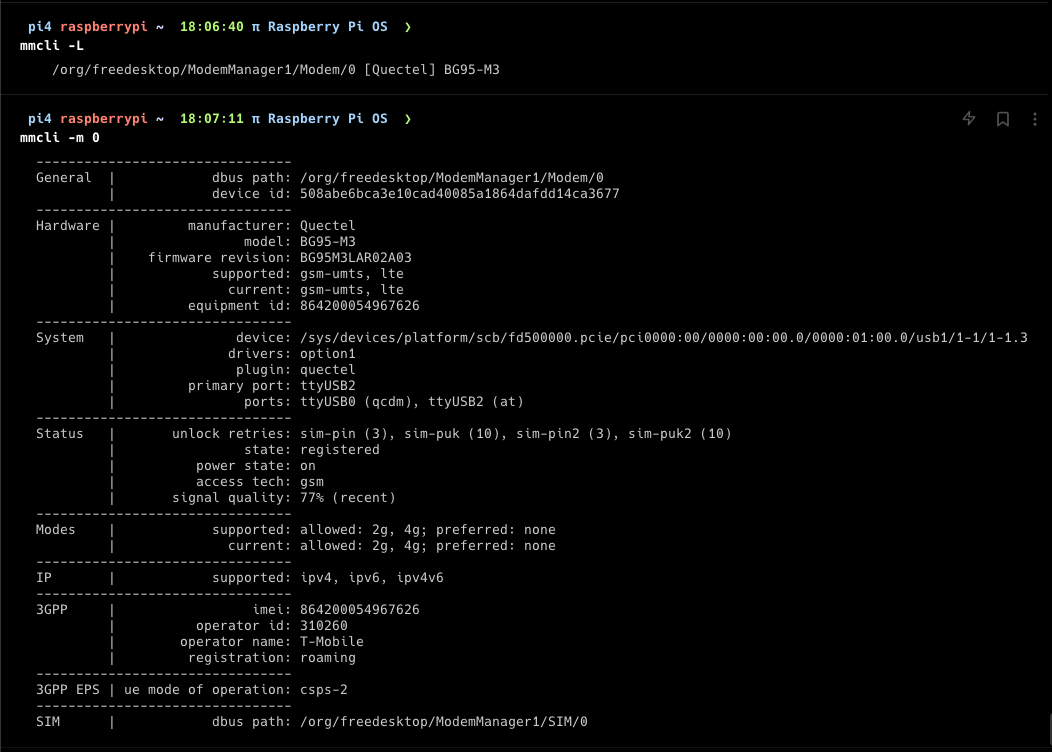
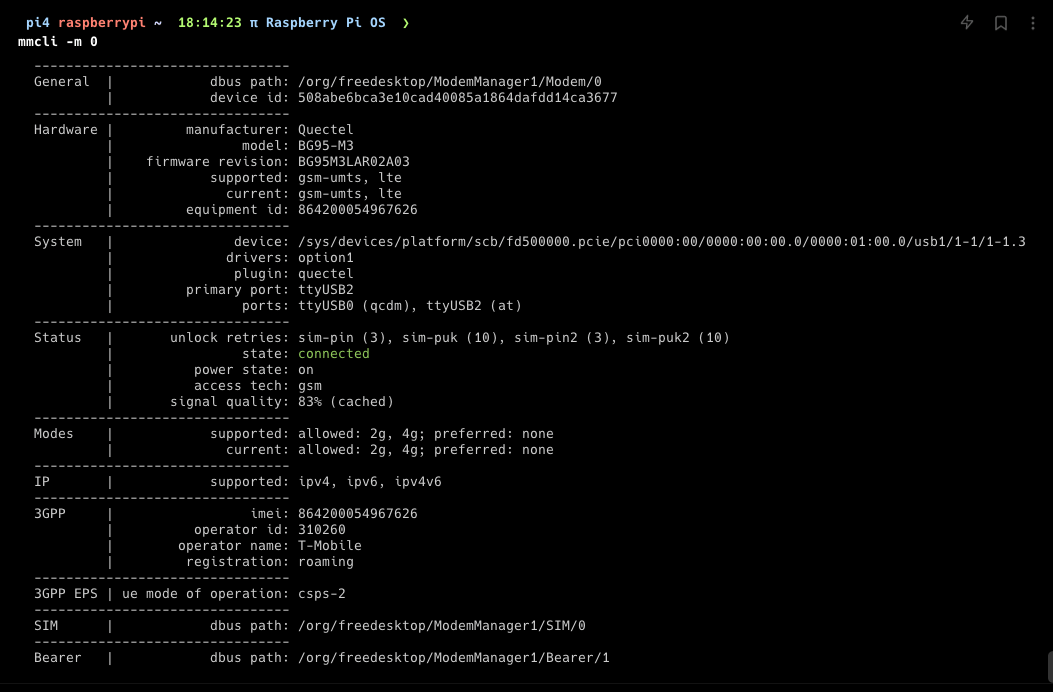
 Connect the modem to the network using ModemManager and your [APN](/guides/get-started/set-the-device-apn):
```bash theme={null}
# Get your modem ID
mmcli -L
# Verify your modem details
mmcli -m
# Connect the modem to the network
sudo mmcli -m --simple-connect="apn="
# Verify the changes
mmcli -m
```
Connect the modem to the network using ModemManager and your [APN](/guides/get-started/set-the-device-apn):
```bash theme={null}
# Get your modem ID
mmcli -L
# Verify your modem details
mmcli -m
# Connect the modem to the network
sudo mmcli -m --simple-connect="apn="
# Verify the changes
mmcli -m
```
 Adding the connection to NetworkManager sets up the correct IP routes.
```bash theme={null}
# Look for the GENERAL.TYPE and GENERAL.DEVICE values for the next step
nmcli device show
```
Adding the connection to NetworkManager sets up the correct IP routes.
```bash theme={null}
# Look for the GENERAL.TYPE and GENERAL.DEVICE values for the next step
nmcli device show
```
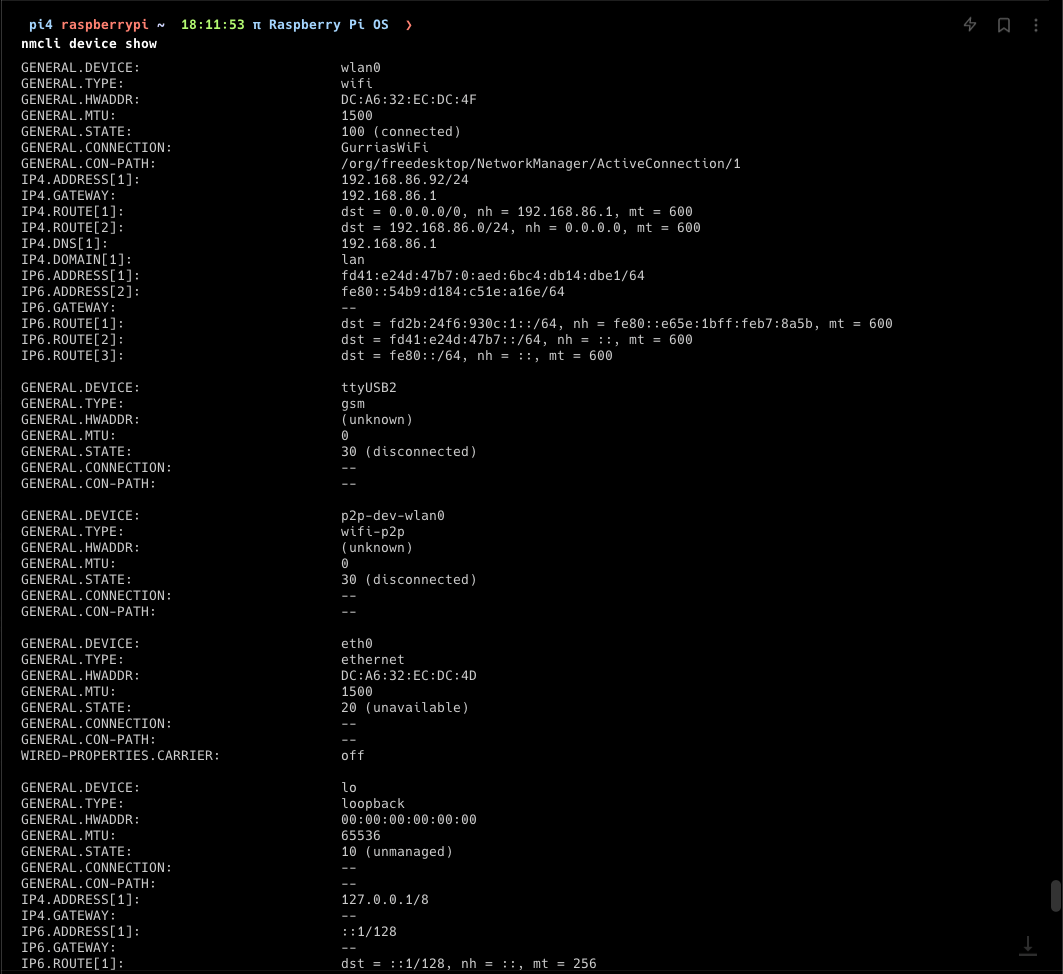 Create the connection, replacing the placeholders with your own values:
* `` — the `GENERAL.DEVICE` value from the previous command.
* `` — any name you choose for the connection.
* `` — the APN for your SIM.
```bash theme={null}
sudo nmcli connection add type gsm ifname "" con-name apn
# Verify the changes
nmcli connection show
# To update an existing connection with other modem details:
# sudo nmcli connection modify ifname "" apn
# For more options and how to use them:
# nmcli connection --help
```
Create the connection, replacing the placeholders with your own values:
* `` — the `GENERAL.DEVICE` value from the previous command.
* `` — any name you choose for the connection.
* `` — the APN for your SIM.
```bash theme={null}
sudo nmcli connection add type gsm ifname "" con-name apn
# Verify the changes
nmcli connection show
# To update an existing connection with other modem details:
# sudo nmcli connection modify ifname "" apn
# For more options and how to use them:
# nmcli connection --help
```

 **Note:** The `type gsm` connection works well with Verizon SIMs too, as long as your modem is Verizon certified and you use the correct Verizon profile type (Cat-1+ vs. Cat-M).
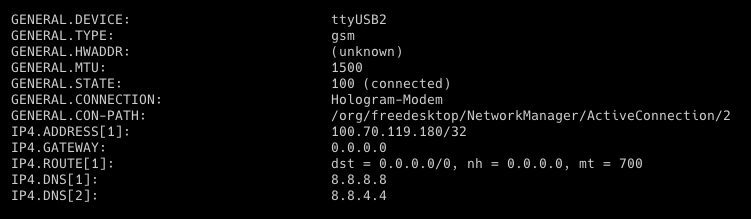
Confirm the modem connection appears in NetworkManager on the correct `TYPE` and `DEVICE`, and shows as connected (green):
```bash theme={null}
nmcli connection show
```
**Note:** The `type gsm` connection works well with Verizon SIMs too, as long as your modem is Verizon certified and you use the correct Verizon profile type (Cat-1+ vs. Cat-M).
Confirm the modem connection appears in NetworkManager on the correct `TYPE` and `DEVICE`, and shows as connected (green):
```bash theme={null}
nmcli connection show
```
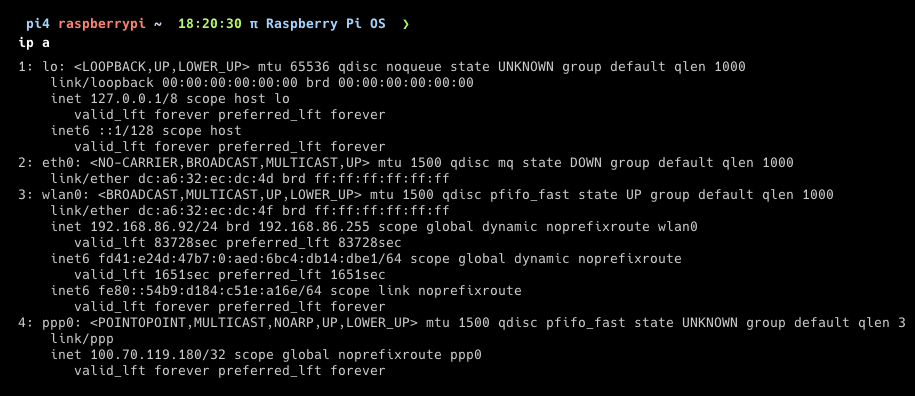
 Confirm your IP table has the appropriate `wwan0` or `ppp0` interface, including the SIM's IP address:
```bash theme={null}
ip a
```
Confirm your IP table has the appropriate `wwan0` or `ppp0` interface, including the SIM's IP address:
```bash theme={null}
ip a
```
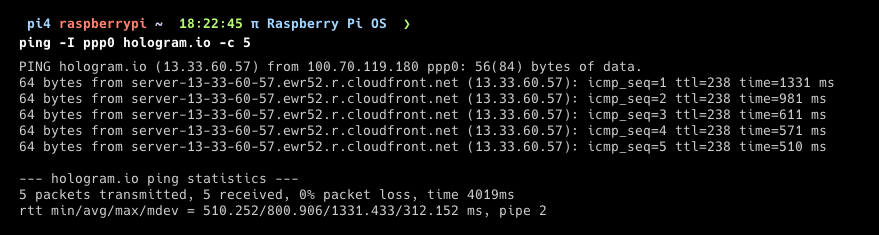
 Test the new connection by pinging `hologram.io`. Replace `` with the appropriate interface (`wwan0` or `ppp0`):
```bash theme={null}
ping -I hologram.io -c 5
```
Test the new connection by pinging `hologram.io`. Replace `` with the appropriate interface (`wwan0` or `ppp0`):
```bash theme={null}
ping -I hologram.io -c 5
```
 Turn off the Raspberry Pi's WiFi and open a site such as `https://www.google.com` in a browser.
**Congratulations!** Your Raspberry Pi is now connected to the internet through your cellular modem.
## Troubleshooting
### General troubleshooting commands
Use the built-in help for each tool to explore available options:
```bash theme={null}
# More info: https://manpages.ubuntu.com/manpages/bionic/man8/mmcli.8.html
mmcli --help
# More info: https://manpages.ubuntu.com/manpages/kinetic/en/man1/nmcli.1.html
nmcli --help
```
### Add IP routes manually
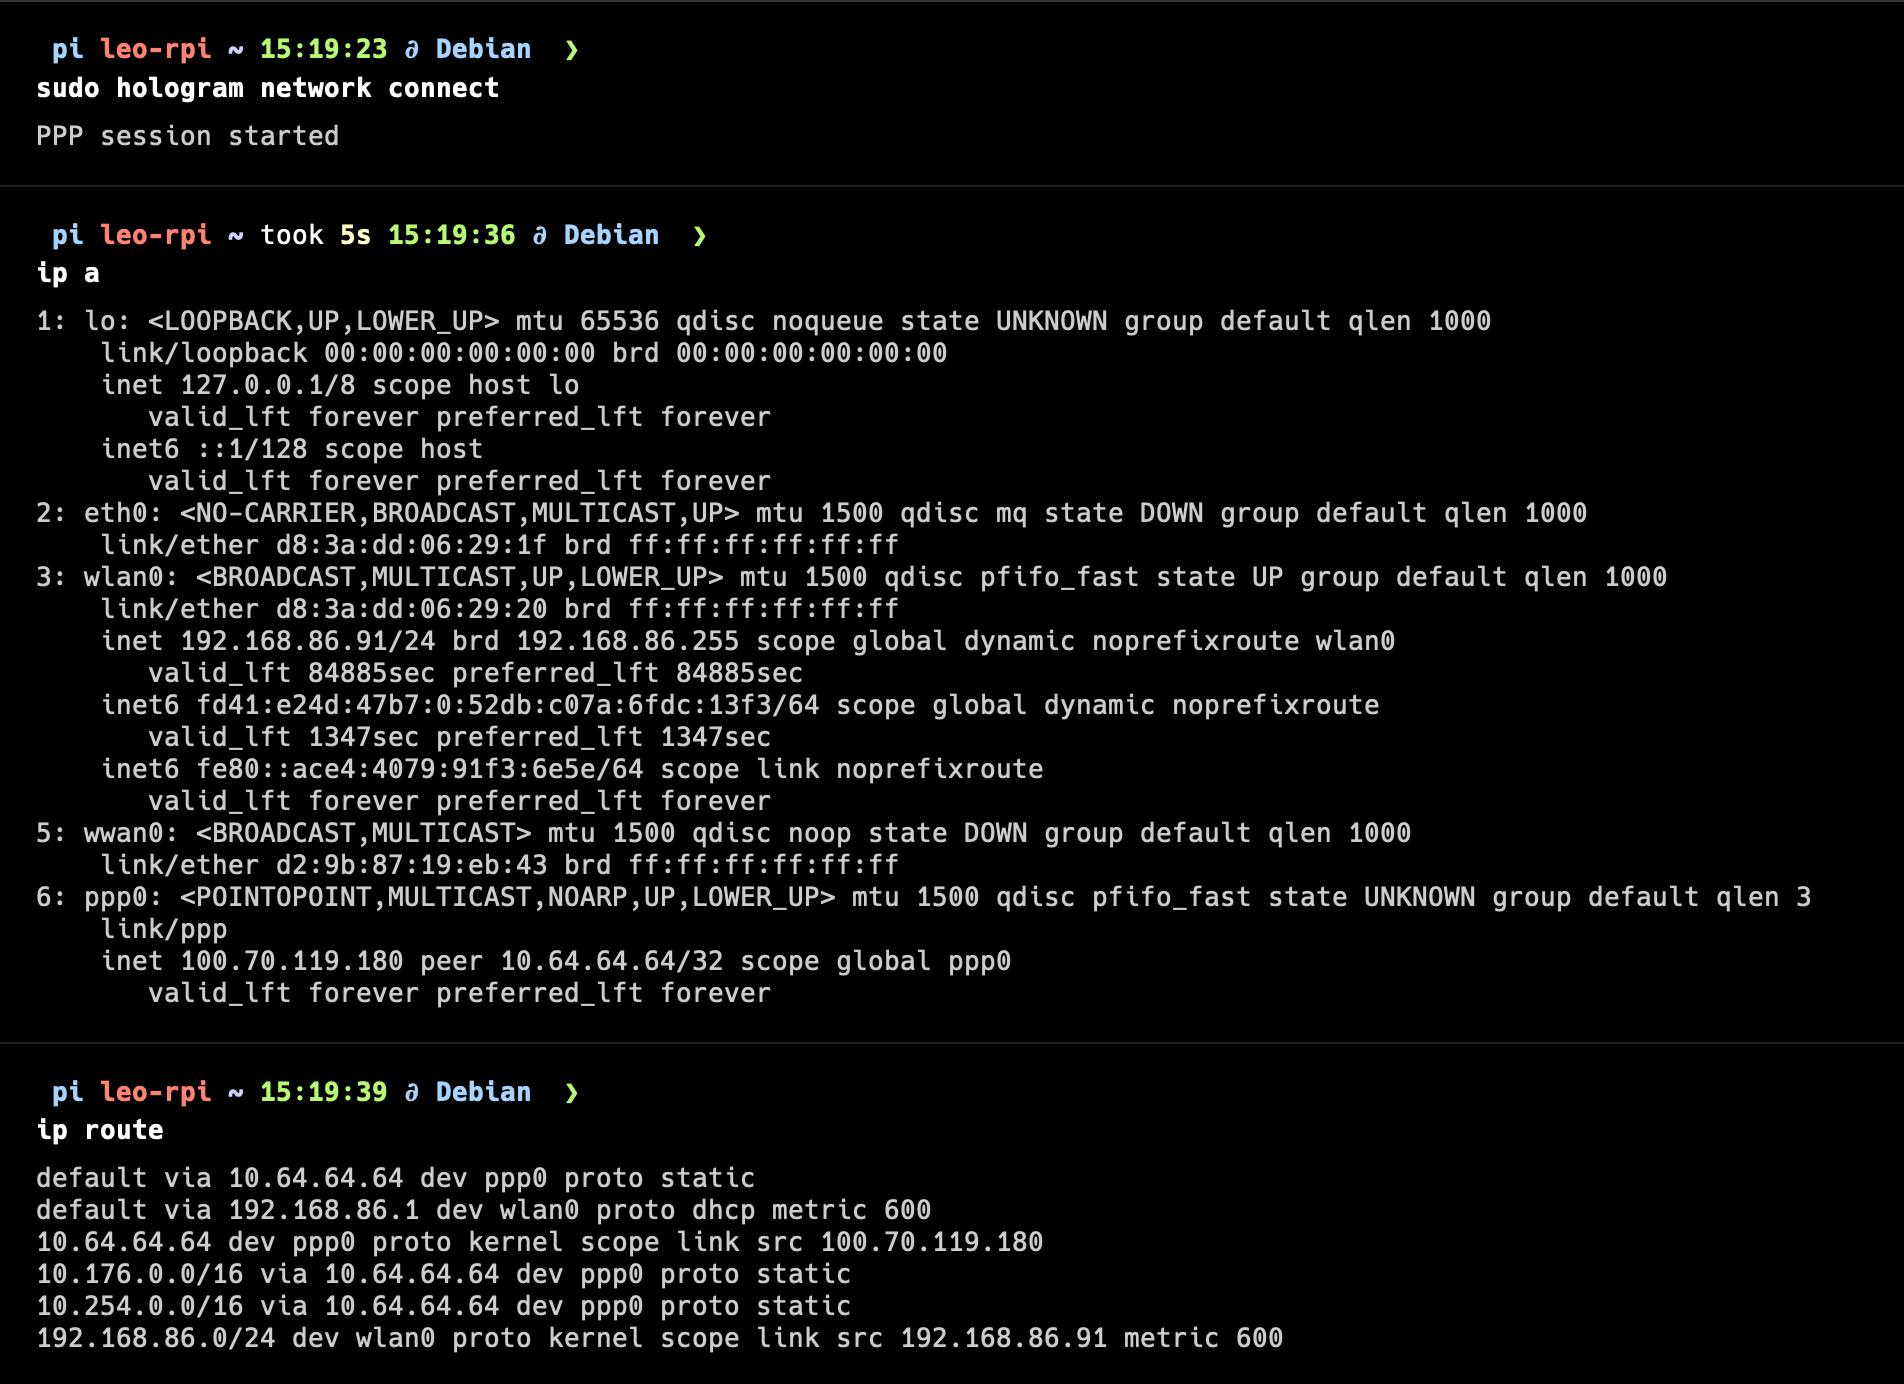
If these or other tools are giving you issues, the device most likely does not have the correct routes configured. Add them manually with the commands below. You need to re-add these routes every time the device boots, unless you use the Hologram SDK, which configures them automatically.
```bash theme={null}
# These routes apply to all Hologram SIMs, regardless of the upstream partner: 10.176.0.0/16 and 10.254.0.0/16
# Replace with the appropriate value (wwan0, ppp0, etc.)
ip route add 10.176.0.0/16 dev
# This route also lets you use Spacebridge while on WiFi
ip route add 10.254.0.0/16 dev
# Verify
ip route
```
Turn off the Raspberry Pi's WiFi and open a site such as `https://www.google.com` in a browser.
**Congratulations!** Your Raspberry Pi is now connected to the internet through your cellular modem.
## Troubleshooting
### General troubleshooting commands
Use the built-in help for each tool to explore available options:
```bash theme={null}
# More info: https://manpages.ubuntu.com/manpages/bionic/man8/mmcli.8.html
mmcli --help
# More info: https://manpages.ubuntu.com/manpages/kinetic/en/man1/nmcli.1.html
nmcli --help
```
### Add IP routes manually
If these or other tools are giving you issues, the device most likely does not have the correct routes configured. Add them manually with the commands below. You need to re-add these routes every time the device boots, unless you use the Hologram SDK, which configures them automatically.
```bash theme={null}
# These routes apply to all Hologram SIMs, regardless of the upstream partner: 10.176.0.0/16 and 10.254.0.0/16
# Replace with the appropriate value (wwan0, ppp0, etc.)
ip route add 10.176.0.0/16 dev
# This route also lets you use Spacebridge while on WiFi
ip route add 10.254.0.0/16 dev
# Verify
ip route
```
 ### Run AT commands through ModemManager
You can put ModemManager in debug mode to run AT commands directly through it:
```bash theme={null}
# Find the service file
ls -lrt /lib/systemd/system/ModemManager.service
# Find the line that starts with ExecStart and add --debug at the end.
# It should end up looking like:
ExecStart=/usr/sbin/ModemManager --debug
# Restart the ModemManager service (or reboot the Raspberry Pi), then run AT commands like this:
sudo mmcli -m 0 --command='+cgmi'
# Note: registration status commands are not shown in mmcli responses but
# logged in the Linux system logs and can be accessed with one of the below
# depending on the OS version:
# Debian 11 or older
cat /var/log/syslog | grep -i "+cereg:" | tail -1
# Debian 12+
journalctl -u ModemManager | grep -i "+cereg:" | tail -1
```
## Optional: AT command access alongside the cellular connection
By default, ModemManager claims all AT-capable ports on the EG25-G, which prevents external tools from accessing them. The fix is to free up `ttyUSB3` with a udev rule while leaving ModemManager in control of `ttyUSB2` for the cellular connection.
```bash theme={null}
sudo nano /etc/udev/rules.d/99-quectel-at.rules
```
Add the following line:
```text theme={null}
SUBSYSTEM=="tty", KERNEL=="ttyUSB3", ENV{ID_MM_PORT_IGNORE}="1"
```
```bash theme={null}
sudo udevadm control --reload-rules
sudo udevadm trigger
sudo systemctl restart ModemManager
```
```bash theme={null}
sudo mmcli -m 0 -v | grep ttyUSB
```
Expected output:
```text theme={null}
ports: cdc-wdm0 (qmi), ttyUSB0 (ignored), ttyUSB1 (gps),
ttyUSB2 (at), ttyUSB3 (ignored), wwan0 (net)
```
`ttyUSB3` is now permanently free for AT command tools such as minicom or [AT Command Wrangler](https://wrangler.wovyn.com/), while the cellular data connection continues running on `ttyUSB2`. The rule persists across reboots automatically.
### Port reference
| Port | Role |
| ---------- | -------------------------- |
| `ttyUSB0` | Diagnostic (QCDM) — not AT |
| `ttyUSB1` | GPS/NMEA |
| `ttyUSB2` | AT — used by ModemManager |
| `ttyUSB3` | AT — free for your use |
| `cdc-wdm0` | QMI interface |
| `wwan0` | Network interface |
### Run AT commands through ModemManager
You can put ModemManager in debug mode to run AT commands directly through it:
```bash theme={null}
# Find the service file
ls -lrt /lib/systemd/system/ModemManager.service
# Find the line that starts with ExecStart and add --debug at the end.
# It should end up looking like:
ExecStart=/usr/sbin/ModemManager --debug
# Restart the ModemManager service (or reboot the Raspberry Pi), then run AT commands like this:
sudo mmcli -m 0 --command='+cgmi'
# Note: registration status commands are not shown in mmcli responses but
# logged in the Linux system logs and can be accessed with one of the below
# depending on the OS version:
# Debian 11 or older
cat /var/log/syslog | grep -i "+cereg:" | tail -1
# Debian 12+
journalctl -u ModemManager | grep -i "+cereg:" | tail -1
```
## Optional: AT command access alongside the cellular connection
By default, ModemManager claims all AT-capable ports on the EG25-G, which prevents external tools from accessing them. The fix is to free up `ttyUSB3` with a udev rule while leaving ModemManager in control of `ttyUSB2` for the cellular connection.
```bash theme={null}
sudo nano /etc/udev/rules.d/99-quectel-at.rules
```
Add the following line:
```text theme={null}
SUBSYSTEM=="tty", KERNEL=="ttyUSB3", ENV{ID_MM_PORT_IGNORE}="1"
```
```bash theme={null}
sudo udevadm control --reload-rules
sudo udevadm trigger
sudo systemctl restart ModemManager
```
```bash theme={null}
sudo mmcli -m 0 -v | grep ttyUSB
```
Expected output:
```text theme={null}
ports: cdc-wdm0 (qmi), ttyUSB0 (ignored), ttyUSB1 (gps),
ttyUSB2 (at), ttyUSB3 (ignored), wwan0 (net)
```
`ttyUSB3` is now permanently free for AT command tools such as minicom or [AT Command Wrangler](https://wrangler.wovyn.com/), while the cellular data connection continues running on `ttyUSB2`. The rule persists across reboots automatically.
### Port reference
| Port | Role |
| ---------- | -------------------------- |
| `ttyUSB0` | Diagnostic (QCDM) — not AT |
| `ttyUSB1` | GPS/NMEA |
| `ttyUSB2` | AT — used by ModemManager |
| `ttyUSB3` | AT — free for your use |
| `cdc-wdm0` | QMI interface |
| `wwan0` | Network interface |